
Why Venting a Bathroom Fan Into the Attic Is a Costly Renovation Mistake in BC

Venting a bathroom fan into the attic can cause mould, condensation, and rot in BC homes. Learn why proper exterior venting matters today.
In home renovation, people usually notice the visible stuff first. The vanity. The tile. The new countertop. The kitchen cabinet color someone debated for two weeks. In a bigger remodel, maybe the custom kitchen cabinet layout, new cabinetry, a quartz or marble surface, or better closet and storage solutions. Fair enough. Those are the parts you live with every day.
But hidden work decides whether a renovation holds up.
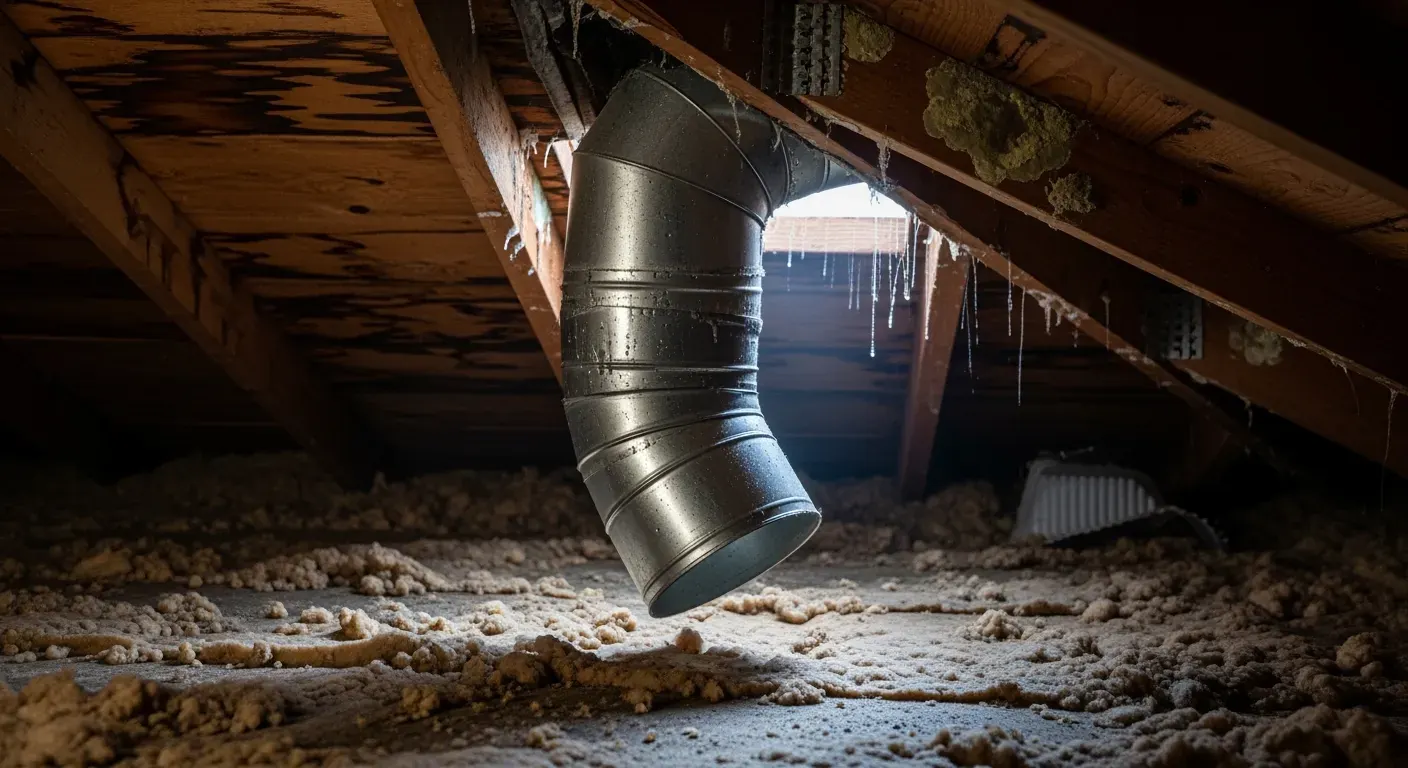
One of the most expensive shortcuts I see homeowners run into is a bathroom exhaust fan that dumps warm, wet air into the attic instead of venting outside. It sounds minor. It is not. In BC’s damp climate, that mistake can lead to attic condensation, mould, stained roof sheathing, soaked insulation, and eventually wood rot.
And the annoying part is that it is preventable.
If you are planning a bathroom renovation, buying a recently renovated home, or trying to figure out why your attic smells musty every winter, this is worth understanding.
The shortcut, and why it happens
A bathroom fan has one basic job. It pulls humid air out of the bathroom and sends it outdoors.
When that air gets sent into the attic instead, the fan is only moving the problem. It is not removing it.
Why does this happen? Usually for one of a few reasons:
The installer took the easiest route during a renovation.
There was poor access to the roof or exterior wall.
Someone assumed the attic was “ventilated enough” to handle it.
The duct was meant to connect to an exterior cap, but never got finished.
The duct came loose later and nobody noticed.
This is one of those mistakes that can stay hidden for months or years. The bathroom seems fine. The fan makes noise. Air moves. Nobody climbs into the attic on a cold, damp morning to see what is happening above the ceiling.
That delay is what makes it so expensive. By the time stains, mould, or rot show up, the fix is usually bigger than reconnecting one duct.
Why BC homes are especially vulnerable
BC is a big province, so no single description fits every location. Still, many homeowners deal with long wet seasons, high outdoor humidity, and cool temperatures for much of the year. Those conditions are rough on roof spaces.
Here is the basic physics.
A hot shower loads the bathroom air with moisture. The fan pulls that air into the duct. If the duct ends in the attic, the moisture hits colder surfaces like roof sheathing, nails, truss plates, rafters, and framing. When warm, moist air touches a cold surface, water condenses out.
That is the whole problem in one sentence.
In winter, it gets worse. The attic is cold, the shower air is warm, and the temperature difference is larger. You can get visible droplets on roof nails, damp sheathing, frost in colder areas, and insulation that slowly gets wetter over time.
And once insulation is wet, it stops doing its job well. So now you have a moisture problem and an energy problem.
People sometimes assume attics “breathe,” so a little bathroom steam will disappear. Sometimes it does, until it doesn’t. Repeated moisture loading is the issue. One shower does not ruin an attic. Hundreds of showers, in a damp climate, with bad venting, absolutely can.
What actually goes wrong in the attic
The damage usually builds in stages.
At first, you may only get intermittent condensation. A bit of dampness on the underside of the roof deck. Some moisture on metal fasteners. Maybe a faint musty smell.
Then things start to stack up.
The roof sheathing stays wet longer. Mould begins growing on wood surfaces. Insulation mats down or becomes patchy as it absorbs moisture. Metal connectors can corrode. Wood remains damp long enough for decay fungi to become a real concern.
Left alone, that can lead to:
Mould growth on framing and sheathing
Wet or compressed insulation
Dark staining on wood
Rusted nails and metal plates
Peeling paint or bathroom ceiling damage below
Wood rot in roof components
Reduced fan performance because of a poorly installed duct
Some homeowners first notice this as an attic issue. Others notice the bathroom ceiling paint bubbling, a fan that seems useless, or a mildew smell that returns no matter how much they clean.
The hard part is that condensation can look a lot like a roof leak. Sometimes contractors chase the wrong problem because the moisture pattern is not obvious at first glance.
Signs your bathroom fan may be venting into the attic
You do not need to be a building scientist to catch some warning signs. A few basic checks can tell you a lot.
Look for these clues:
You cannot find an exterior vent cap on the roof or wall that matches the bathroom fan.
The fan runs, but there is weak airflow outside.
The attic has a musty smell, especially in cooler months.
You see water droplets, frost, or black spotting on the underside of the roof deck.
Insulation near the bathroom area looks damp, flattened, or stained.
There is flexible ducting in the attic that ends loose, disconnected, or just pointed into open space.
The home had a recent bathroom renovation, but nobody documented where the exhaust terminates.
One practical test is simple. Turn the fan on, then go outside and find the vent termination. You should feel air exhausting. If you cannot find a termination at all, that deserves a closer look.
Why this mistake shows up during bathroom renovation
Most of the time, this problem appears during a bathroom renovation, not because bathrooms are complicated, but because hidden work gets rushed.
When people plan a bathroom renovation, they spend energy on finishes. That makes sense. You are choosing tile, fixtures, lighting, a vanity, maybe even matching storage details with the rest of the house. The visible work gets attention because it is easier to evaluate.
Ventilation sits behind drywall and above ceilings. That makes it easy to treat as a minor detail. It is not.
The risk rises when:
An older fan is being replaced and the old ducting is reused without inspection.
The new bathroom layout changes fan location.
Access is tight and a proper exterior termination takes more time.
A contractor focuses on cosmetic upgrades and treats ventilation like an afterthought.
Nobody checks the attic after the job is done.
This is not unique to basic projects, either. A high-end bathroom renovation can still have bad venting. Expensive tile does not protect roof sheathing. A luxury design approach on the visible side of the project does nothing for moisture if the exhaust route is wrong.
That mismatch happens more often than people expect.
What proper venting looks like
A bathroom fan should exhaust to the exterior through a dedicated duct run that is correctly installed, sealed, and insulated.
That sounds straightforward because it is. The execution is where things go wrong.
A proper setup usually includes a few essentials.
1. A real exterior termination
The duct should end at an approved roof cap or wall cap, depending on the home and the best route. The termination should include a damper so outside air does not freely move back into the duct.
The goal is simple: moist air leaves the house, fully.
2. Insulated ducting
This matters a lot in cooler climates. Warm, humid air moving through a cold attic can condense inside the duct itself if the duct is not insulated. Then you get water collecting in the line, dripping back toward the fan housing, or leaking into the ceiling.
Insulation helps keep the air in the duct warmer long enough to reach the exterior.
3. Short, direct routing
Long runs, crushed flex duct, and too many bends reduce airflow. That means the fan removes less moisture, and the duct is more likely to trap condensation.
Shorter and straighter is better.
4. Sealed connections
Every joint should be properly connected and sealed. Loose connections are common, especially with flexible duct. If the duct slips off in the attic, you are right back to dumping bathroom air into the roof space.
5. A fan sized for the room
Even a properly terminated duct will underperform if the fan is too weak for the bathroom size and usage. Larger bathrooms, enclosed shower areas, or households with frequent back-to-back showers may need more than the cheapest replacement fan.
This does not mean bigger is always better. It means the fan should fit the room and the duct run.
Why insulated ducting matters more than people think
Homeowners often hear “vent it outside” and stop there. That is only half the fix.
A badly installed exterior vent can still create moisture trouble if the duct is uninsulated, sagging, or poorly supported. In that case, condensation can form inside the duct before the air reaches outdoors. Water may collect in low spots and leak back.
That is why attic fixes should not stop at adding a vent cap.
If you are checking renovation work, ask what type of duct was used, whether it is insulated, and how it was routed. Stretching flexible duct tight, supporting it well, and avoiding dips can make a real difference.
It is boring stuff. I know. It is also the stuff that keeps a ceiling dry.
What to check after the renovation is done
A post-renovation inspection is one of the cheapest forms of insurance you can give yourself. You do not need a complicated process. You just need to confirm that the hidden parts were actually finished.
Here is a practical checklist:
Ask where the bathroom fan terminates.
Have the contractor show you the exterior cap.
Turn the fan on and confirm air is exhausting outdoors.
If there is attic access, visually check that the duct is connected, insulated, and supported.
Look for any low spots in the duct where water could pool.
After a few weeks of use, check the attic again during cool weather for dampness or condensation.
Keep any photos, permit records, or inspection notes with your renovation paperwork.
That last point matters more than people expect. If you sell later, clear documentation helps the next owner understand the work was done properly.
If the attic already has condensation, mould, or rot
At that point, fixing the vent path is still necessary, but it is not the whole job.
You also need to figure out how much damage has already happened.
That may include:
Removing and replacing wet insulation
Cleaning or remediating mould-affected materials
Inspecting roof sheathing and framing for decay
Correcting disconnected or uninsulated ducting
Improving attic air sealing if warm indoor air is leaking through ceiling penetrations
Rechecking conditions after the repair during the next wet or cold season
Do not assume a quick spray treatment solves it. If the moisture source remains, the problem comes back. If the wood is already decayed, surface cleaning is not enough.
For minor condensation, the repair may be fairly contained. For long-term moisture exposure, it can turn into a larger attic restoration project. That is the financial difference between catching the issue early and ignoring it for two winters.
This is not just a bathroom problem
Bathrooms get most of the attention because showers create obvious moisture, but they are not the only place where hidden venting errors happen.
In kitchen remodeling, range hoods should also exhaust properly outdoors. Grease, heat, and moisture do not belong in enclosed building cavities. Yet some homeowners spend heavily on visible kitchen details, a custom kitchen cabinet layout, new cabinetry, a marble island, or a quartz countertop, while the ducting gets very little scrutiny.
The same mindset shows up in laundry areas too.
I am not saying finishes do not matter. They do. Affordable quality in visible materials matters because you use them every day. But hidden performance details decide whether the renovation stays healthy behind the walls and above the ceiling.
That is the part people remember only after something smells wrong.
The bottom line
If a bathroom fan vents into the attic, the house has a moisture problem waiting to happen.
In BC, that shortcut is especially risky because damp outdoor conditions and cool attic surfaces make condensation easier to trigger and harder to dry out. Over time, that can mean mould, wet insulation, roof sheathing damage, and rot.
The fix is not complicated in principle. Vent the fan all the way outside. Use properly installed insulated ducting. Keep the run direct. Seal the connections. Then verify the work with a post-renovation inspection.
If you are planning a bathroom renovation, ask about the exhaust route before drywall goes up. If the renovation is already done, check that the fan actually terminates outdoors. And if your attic already shows signs of moisture, deal with the source now, before a hidden shortcut turns into structural repair.
The visible parts of a renovation get the compliments. The hidden parts decide whether the house stays dry.